
Hello folks ! Let me share a tiny proud production of my maker-side with you.
I started a speed-side-project last week and it's already finished on prototype stage. It's faster and easier when you spent like 2 years on another similar project lol.
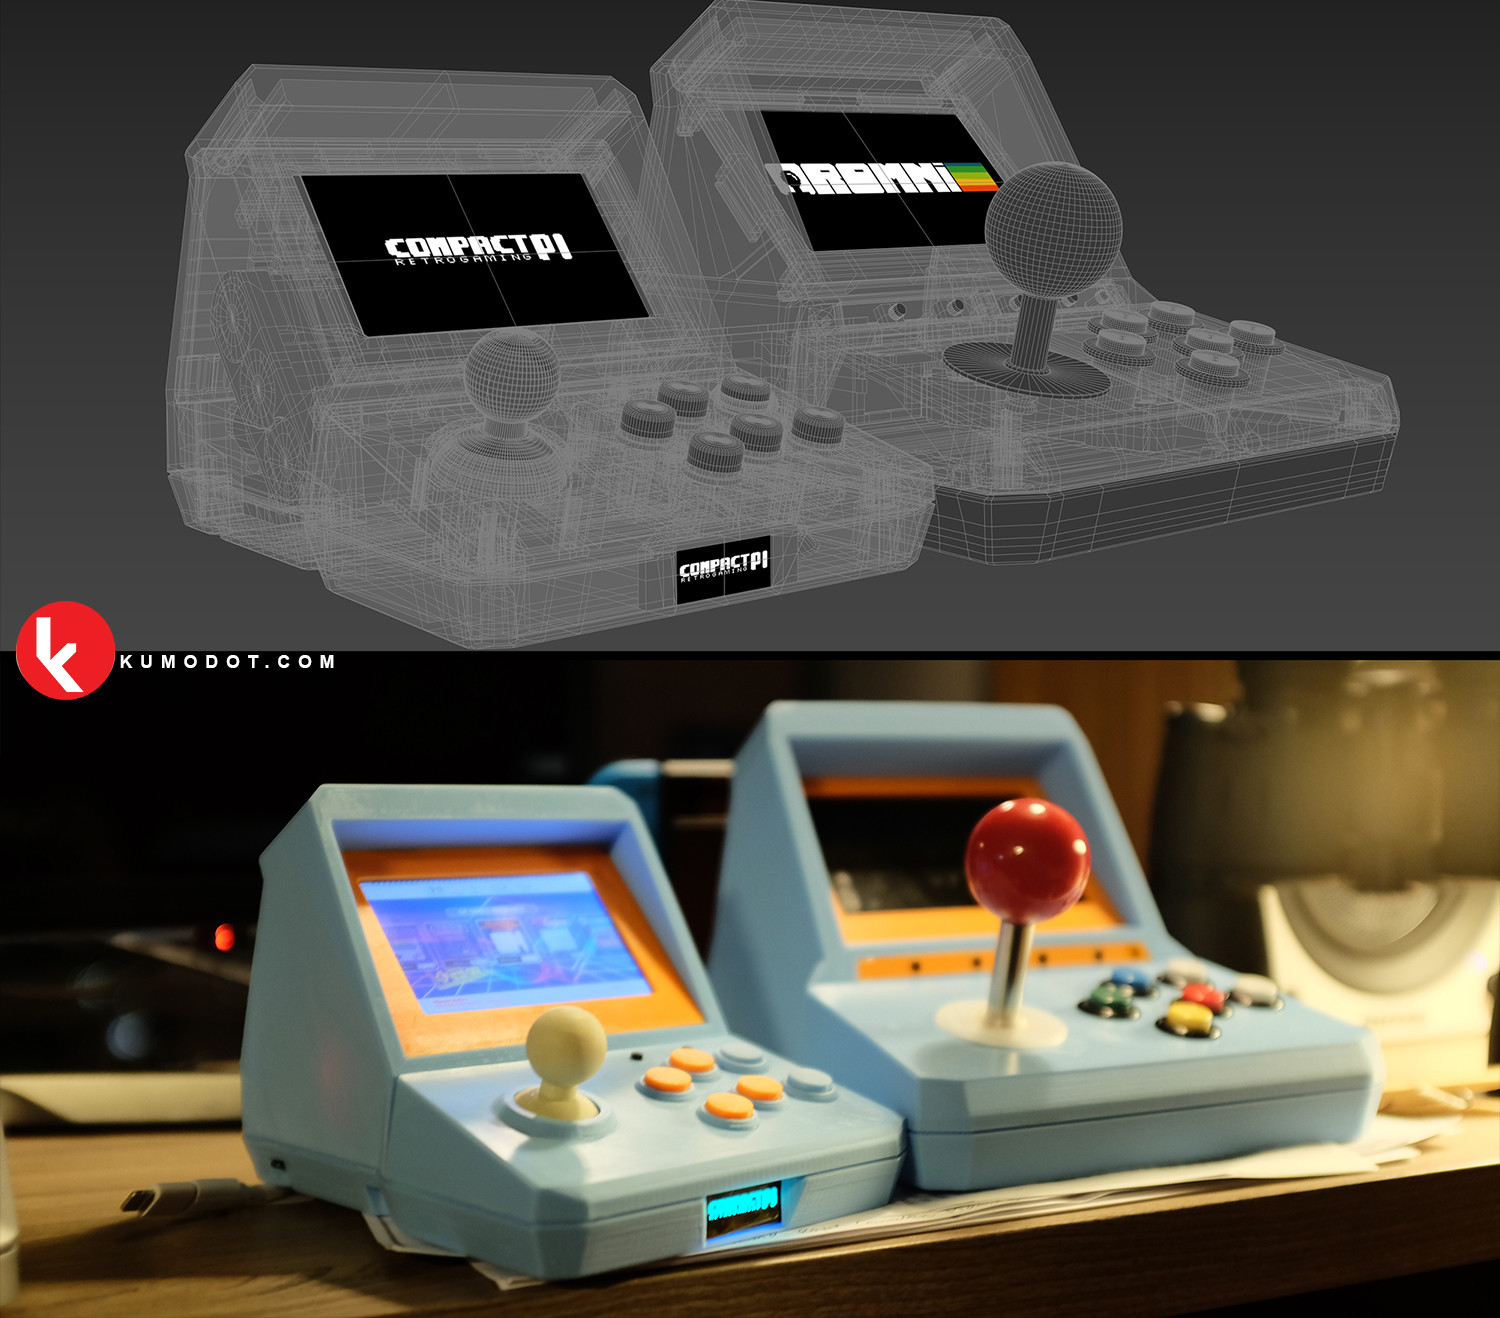
This is a a "fork" on my main project, the Romni arcade. (A 3D Printed-Raspberrypi based mini arcade). I wanna try some new stuff, new screen and then i made a smaller version of if (just because the smaller (but much sharper/digital) screen).
This is the CompatcPi. I just shrank down my old project and changed everything from inside-out structure wise. Some extra hours of modeling and adaptations. Bought some extra parts.Made some code for Arduino act as a Joystick + Digital Logo on front OLED that acts as a battery meter too (The log fills in and out depending on the battery level, lol).
The main difference on this one, of course is the size, the screen, wich is a 800x480-60fps screen with amazing quality, and a tiny regular modded thumbstick as joystick. Romni uses a Full arcade Stick. And this was changed on this project since a full stick will never fit that smaller form factor. It turns out SO cute that i am dying for it. lol. Pretty happy with the results so far. My daughter now wants a unicor version of it. And i will probably make it happen. Cool thing that i can customize the logo in front of it because i had that idea to use a tiny 128x32 tiny oled screen that makes it looks so "futuristic" lol. :) I love oled screens. It even has a custom boot sequence with messages like "Loading nostalgia..." and things like that. lol

I started it like this (lef) just to model the proper casing for the monitor. So i could adapt that casing into the master case as a insert on it. That case is the Orange area on the final product. I made that small stand to play with it while testing it. I plan to publish that first version (left) for download at Thingiverse.com
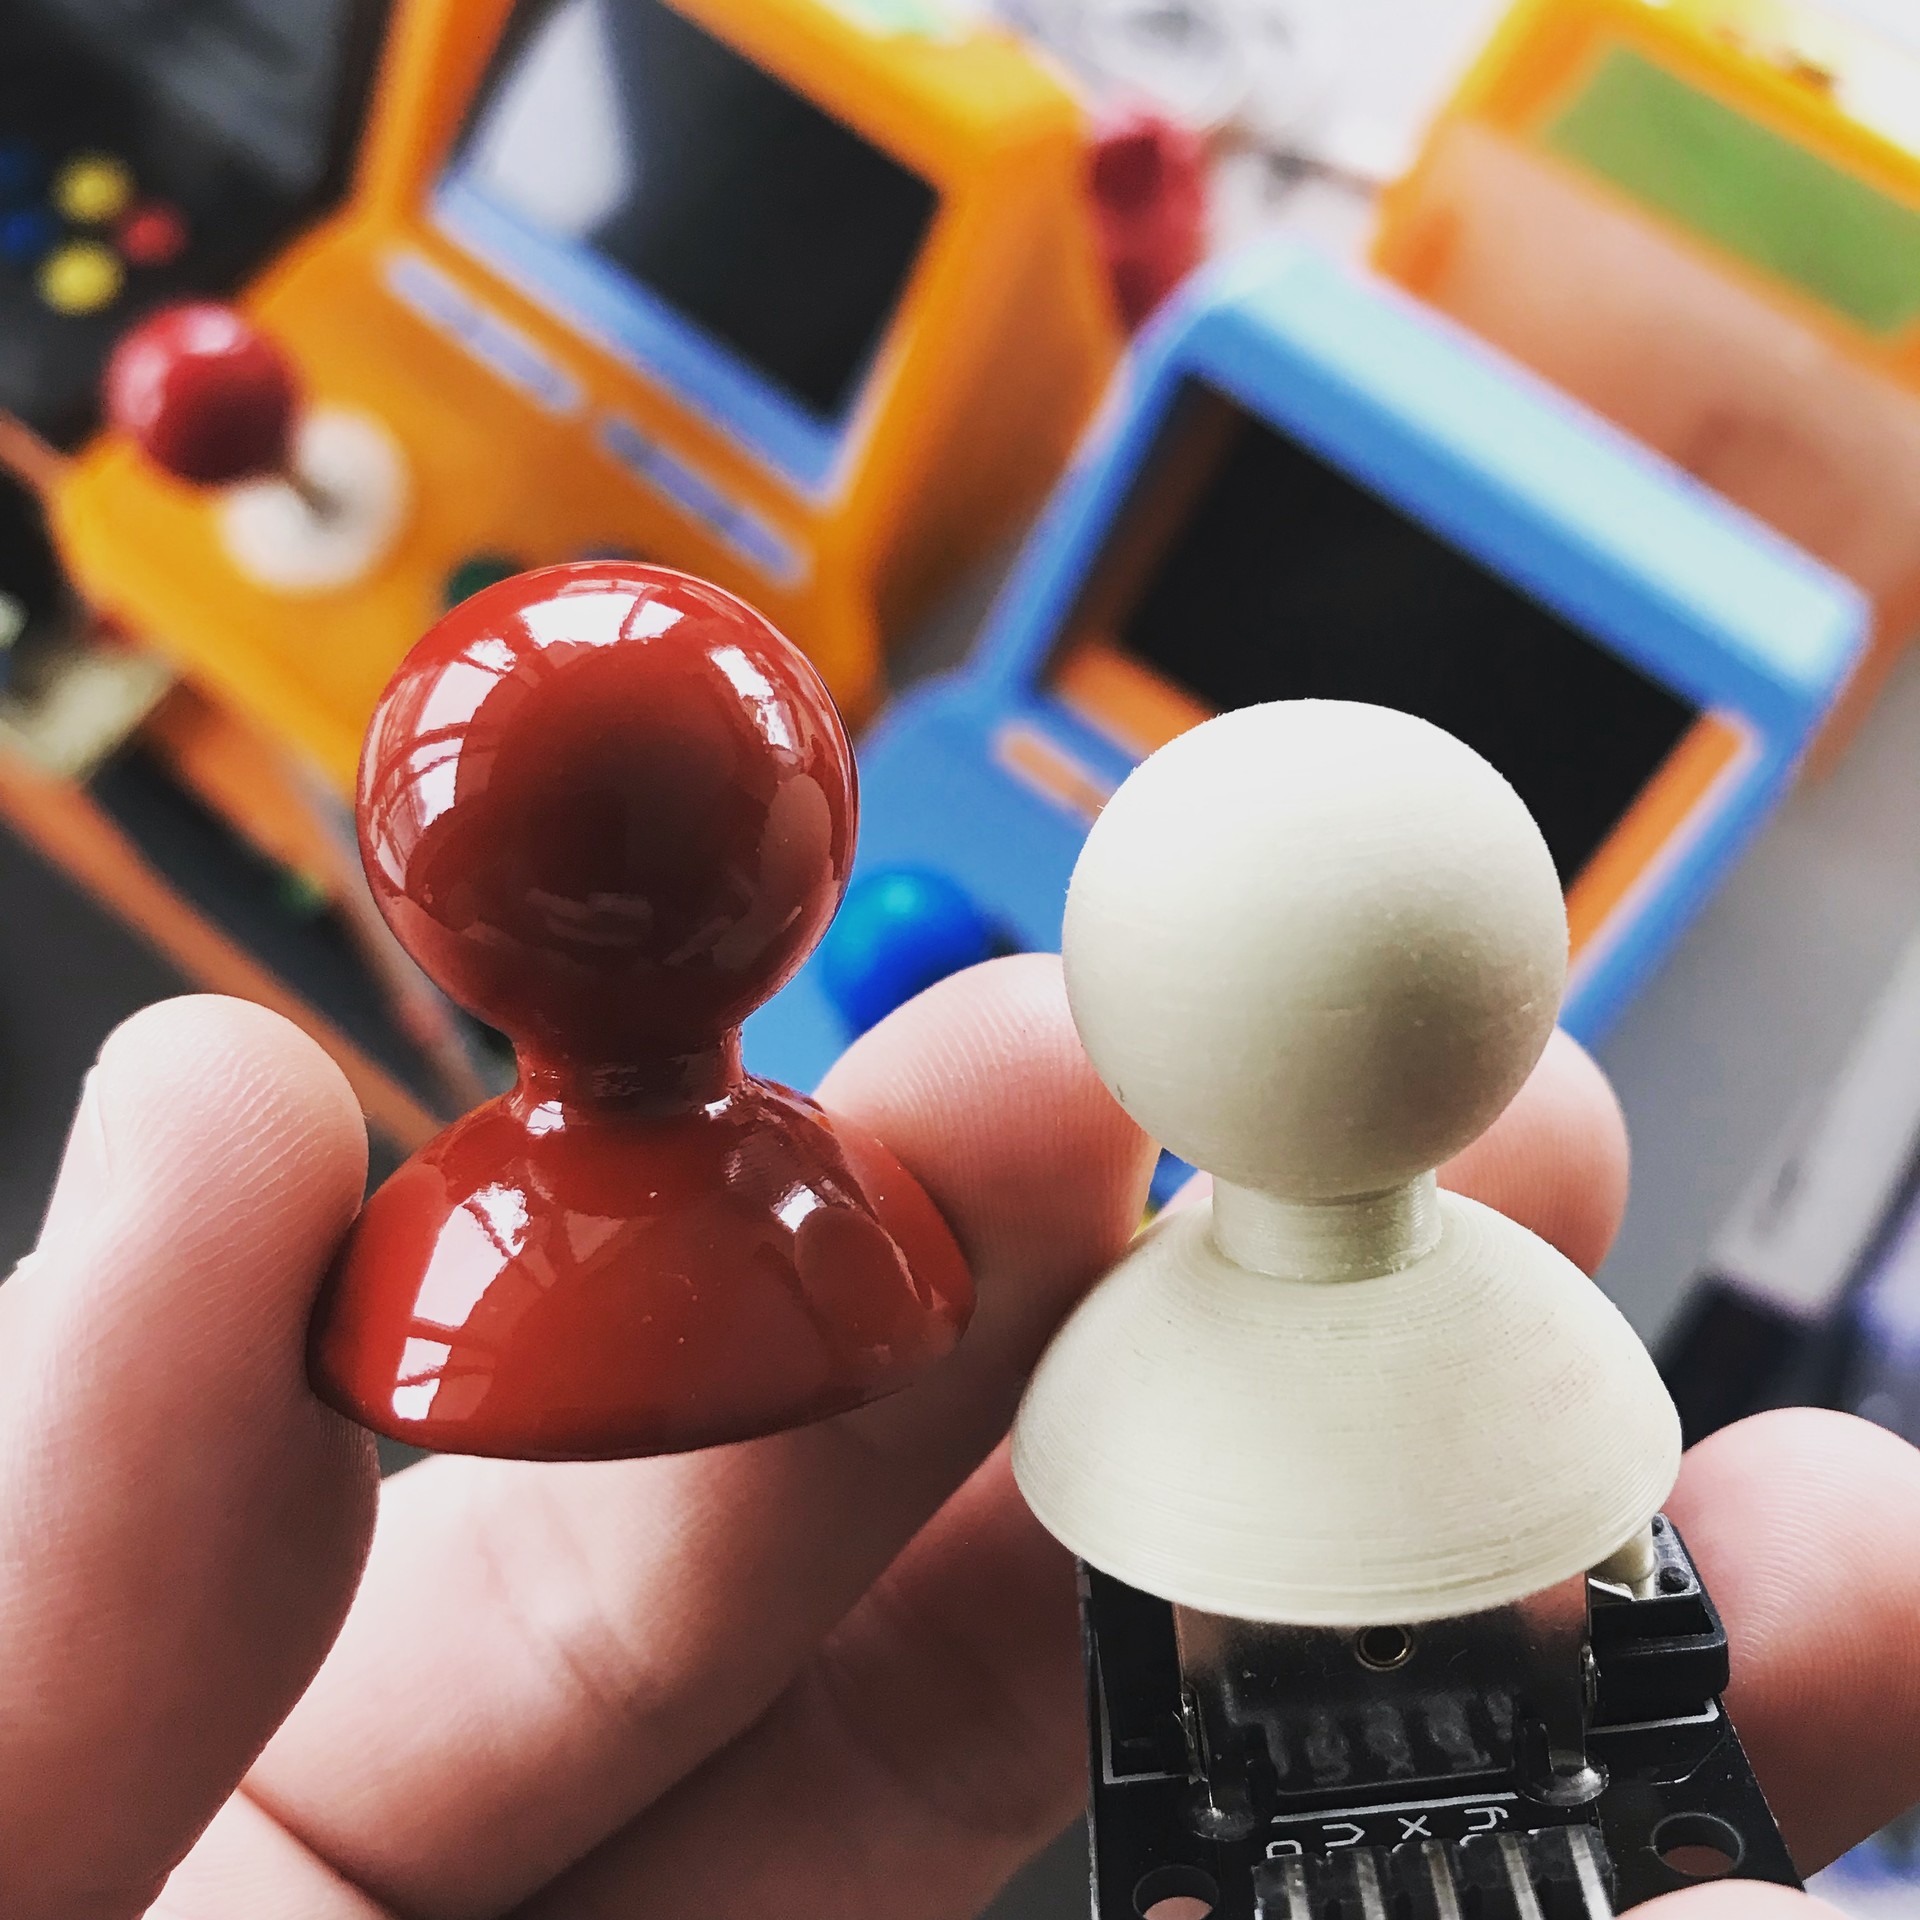
Here's me testing to paint my 3D printed Thumbstick. worked well. But it was a test. I will do it again. ;)
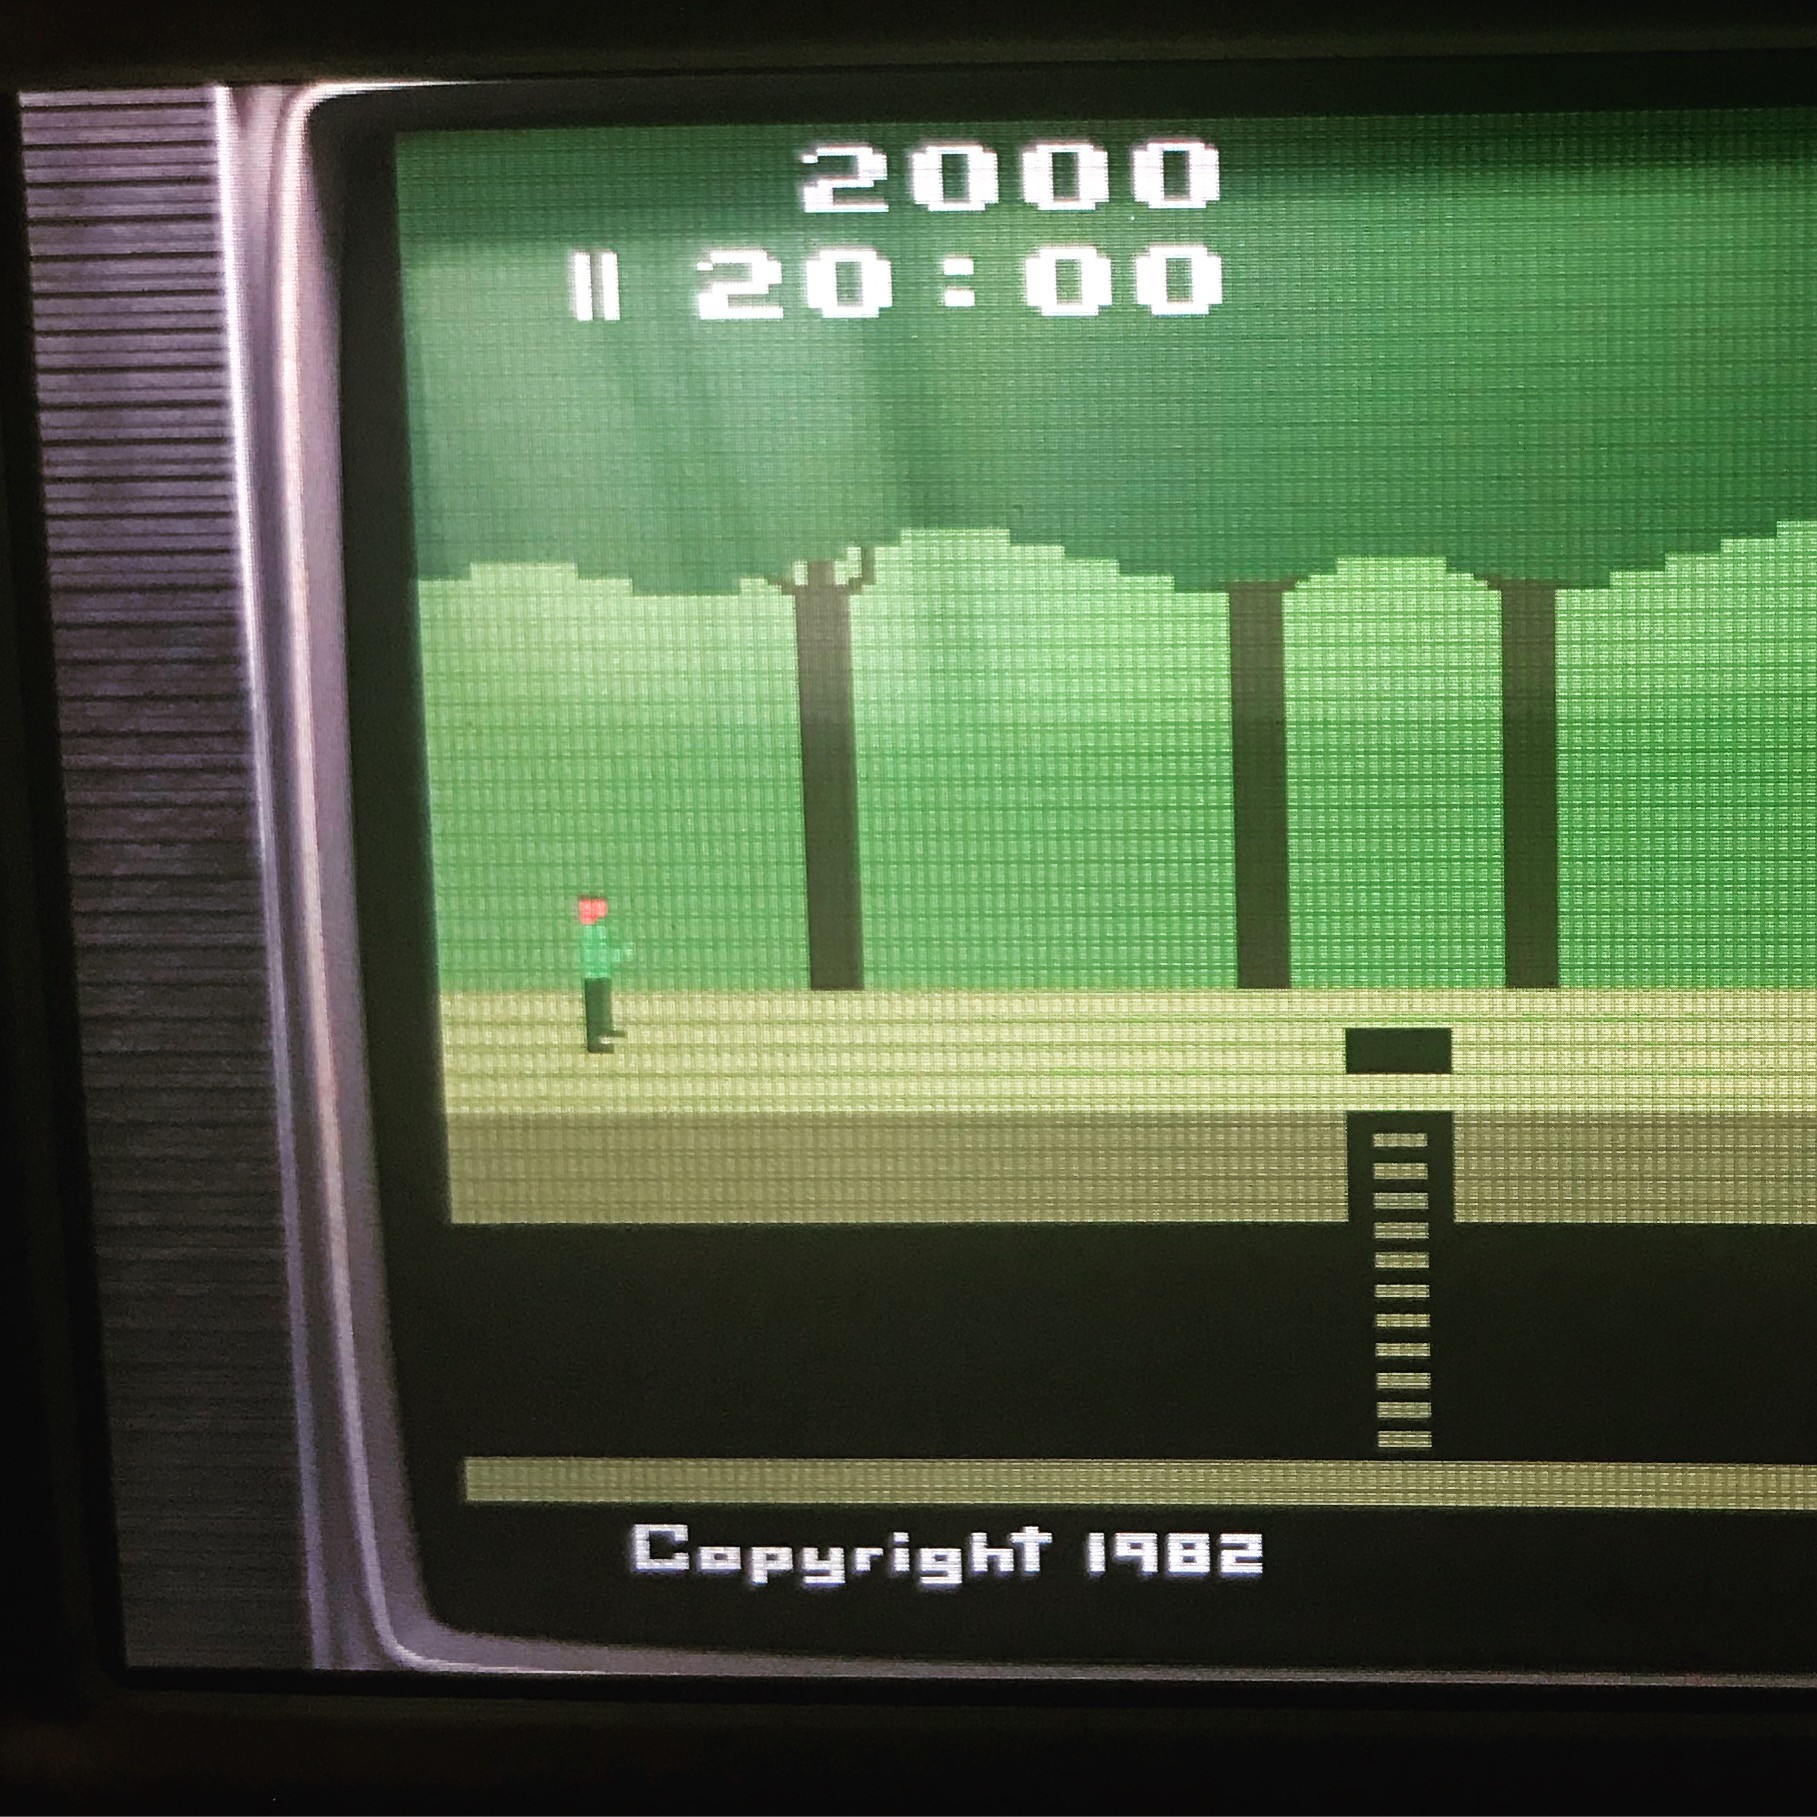
Here's a closep on the Tiny screen. The resolution is GREAT ! I made that OldTv-set Frame to go over the 4:3 games as a overlay frame. So the games runs on native resolution without streching and it adds a LOT of nostalgia to the mood. Love using those overlays.
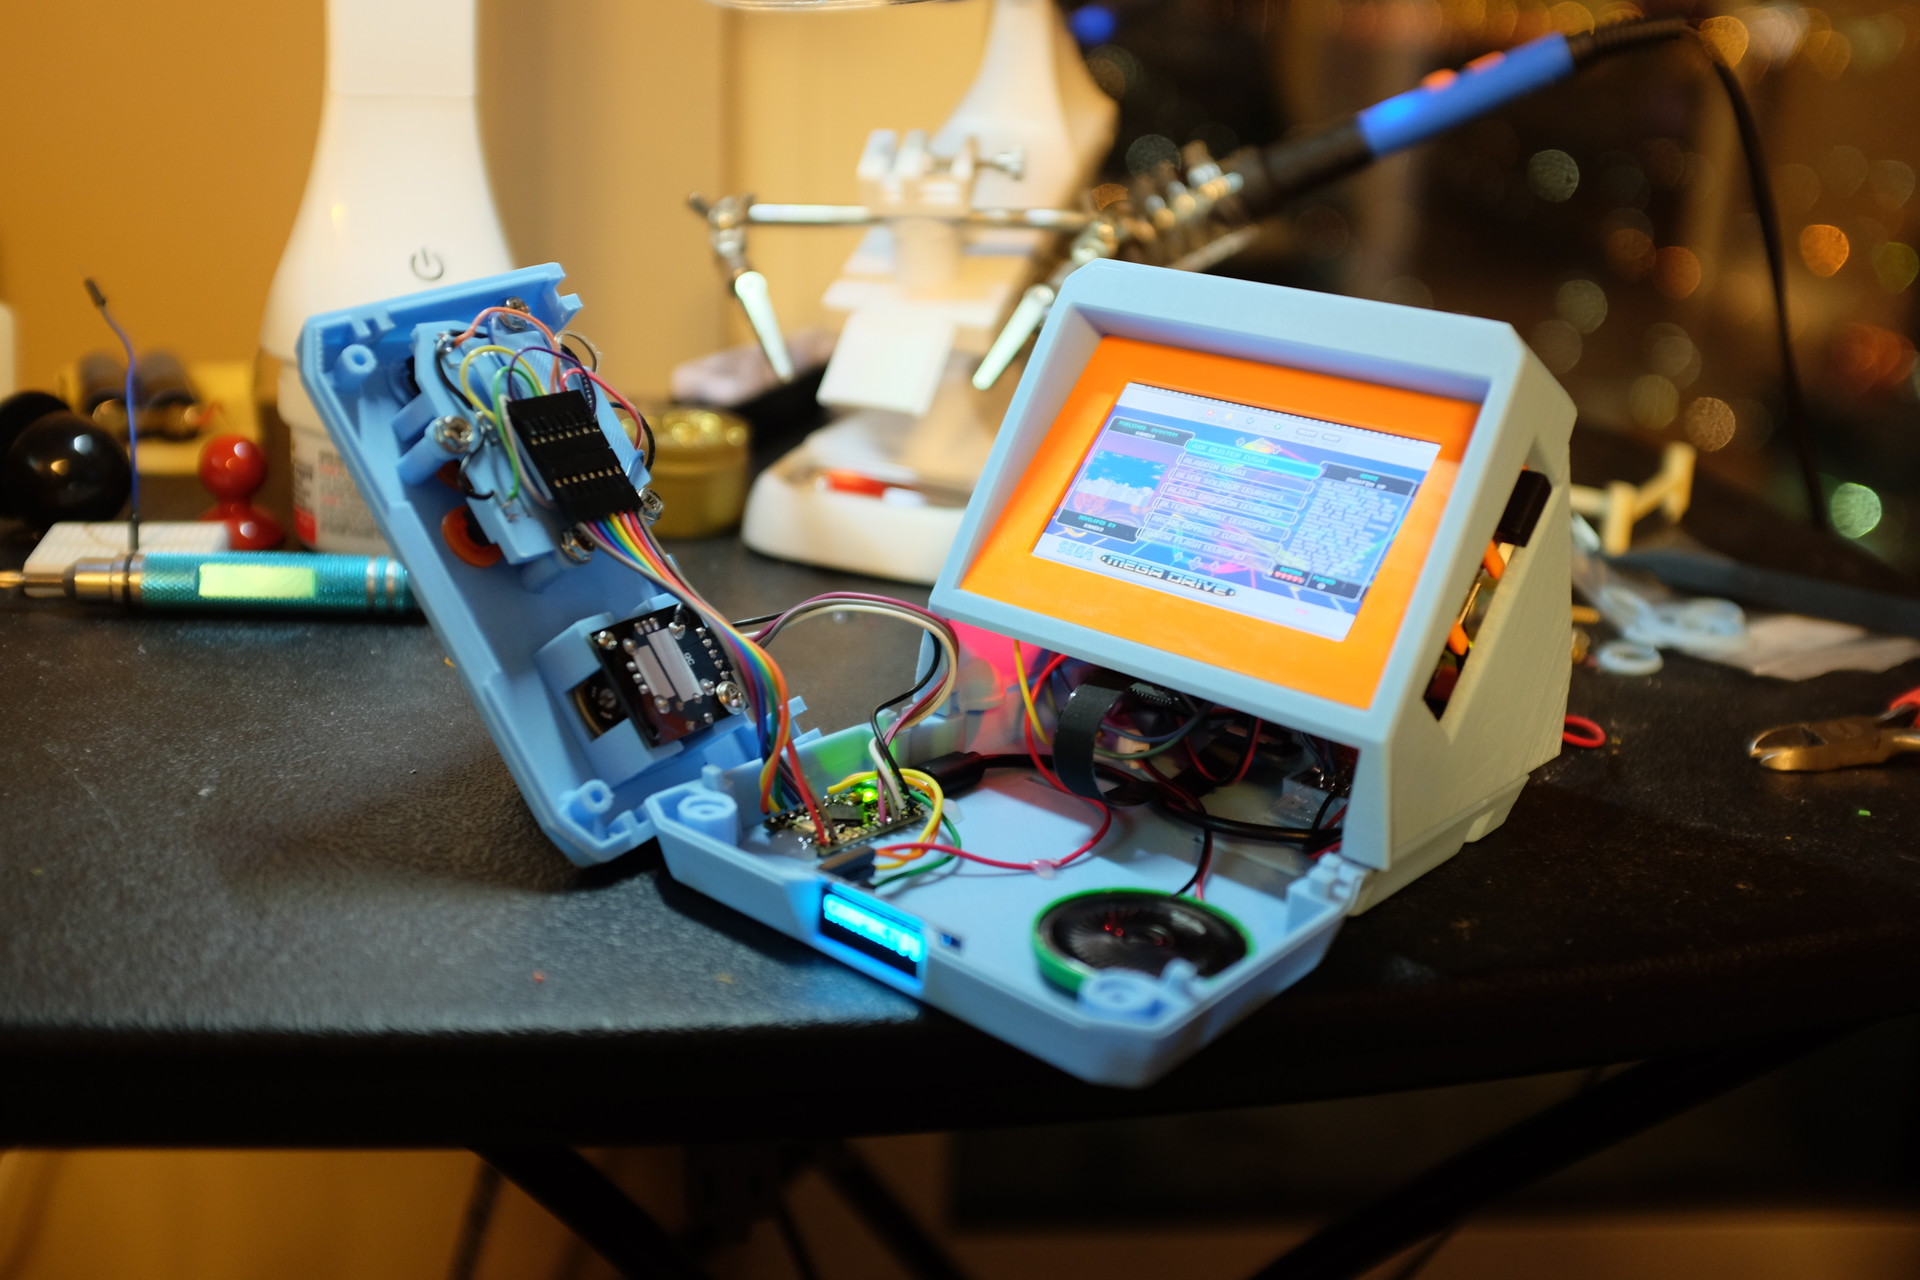
Final wiring - This is the most time consuming stage of it. And the less fun. ;) But it's satisfying when it's done. :)
This is all the frames that i made for both my tiny machines. To use the Digital LOGO on Oled Screen as Battery Meter. The frames are converted into HEX images and hardcoded to the custom circuit (Arduino Pro Micro) inside them.
Hope you guys like this project. If you want to follow the news about it theres instagram accounts and facebook pages for each project here :
INSTAGRAM : @CompactPiarcade and @romniarcade
FACEBOOK : CompactPi and Romni Arcade